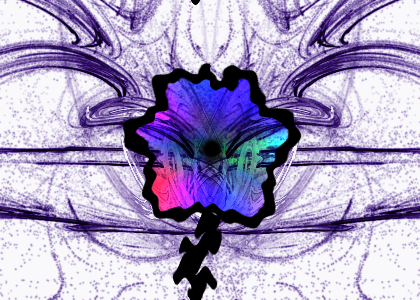
Abstract Flower / Fiore Astratto
Medium - Medio

Questo/a opera è pubblicato sotto una Licenza Creative Commons.
- Create una nuova immagine // Create a new immage
- Andate in: FILTRI / RENDER / NATURA / FIAMME e sceglietene uno di vostro gradimento // Go to: FILTER / RENDER / NATURE / FLAME and choose one that You Like

- Ora coloriamo la nostra fiamma, andate in: Colori / Colora e scegliete un colore a vostro piacimento // To give a color to our flame.. go to Color / Colorize an choose a color that You like

- Duplicate lo sfondo
- Usate il tool rifletti sulla copia dello sfondo // Use the "reflect tool " on the background copy : SHIFT+M
- Usate come metodo di fusione per questo livello: Moltiplica // Set this layer as: Multiply

- Appiattite l'immagine ( Immagine / Appiattisci immagine ) // Flatten the image or fuse all visible layer
- Create un nuovo livello e chiamatelo "flower" / Create a new layer an call it "flower"
- Disegnate una linea come nell' immagine // Make a line like the one of this image

- Applicate sul livello "flower" il filtro: Filtro / Distorsione / Increspature // Use the filter: FIlter / Distort / Ripple on the flower layer

- Ora: Filtro / Distorsione / Coordinate Polari // And Now: Filter / Distort / Polar Coords

- Selezionate lo strumento baccheta magica e cliccate al centro del nostro fiore // Select the "magic hand" and click on the center of our "flower"

- Aumentate le dimensioni della selezione di un pixel come in immagine // Increase the size of the selection as shown in this image ( select / grow )

- Create un nuovo livello sotto "flower".
Avete ora solo 3 livelli come in foto. Chiamate questo nuovo livello "color_1" //Create a new layer under "flower".
Call the new layer "color_1". Now You must have only 3 layers like the image
- Andate su: Filtro / Render / Nuvole / Plasma // Go to: Filter / Render / Clouds / Plasma

- Poi andate su: Filtro / Sfocatura / movimento.
Usate il metodo ZOOM com in immagine // Now go to: Filter / Blur / Motion Blur
use the setting of this image
- Deselezionate tutto: Seleziona / Niente o premete: SHIFT+CTRL+A // Deselect like this image or press SHIFT+CTRL+A

- Ecco lo stato dei lavori // This is the status at this point

- Settate questo livello copia su: Moltiplica // Set this layer as: multiply

- Duplicate il livello "color_1" // Make a copy of "color_1"
- Settate questo livello copia su: Scherma // Set this layer as: dodge

- Create un nuovo livello e al centro fate un solo click col pennello nero e poi usate la sfocatura movimento con metodo zoom ( come fatto prima ) // Create a new layer ( trasparent ) and with the brush make only one click on his center and then use the motion blur with the zoom method

- Create un nuovo livello e chiamatelo "foot" // Create a new layer call it "foot"
- Usate ancora il filtro increspatura ( filtro / distorsione / increspatura ) // Use again the Ripple Filter ( filter / distort / ripple )

- Finito / The End


Video (aggiunto il 18-10-2010):
by
Kain The Supremne.