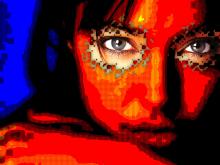
Testo cubista / Cubistic text
Facilissimo - Easy

Questo/a opera è pubblicato sotto una Licenza Creative Commons.
VIDEO:
- Create una nuova immagine con sfondo nero // Create a new image with black background
Selezionate lo strumento testo e scrivete qualcosa ( col bianco ) // Select the text tool and write something ( with white )
Centrate questo livello // Center this layer [ Q ]
- Ora andate su livello / abbandona informazioni sul testo // go to Layer / Lose information about text or something similar

- Andate poi su Livello / Livello a dimensione immagine // go to Layer / Layer to image size or something similar

- Create una copia del livello di testo [chiamatela : fx1 ] // make a copy of your text layer [call it: fx1 ]
- Settate il colore in primo piano e quello di sfondo con colori di vostro gradimento io ho usato: // Set the foreground and background color to a color of your choice, I choose:
FFBB00
FF8944
- Andate su colori / mappa / mappa a gradiente // go to color / map / gradient map
andate ora in filtri / artistici / cubismo // go to filter / artistic / cubism
- Selezionate il livello vostro livello di testo e andate su filtri / mappa / mappa a sbalzo // Select your text layer and than go to filter / map / bumpmap
Usate il livello fx1 come mappa // use the fx1 as layer for the bumpmap
- Settate il livello FX1 come: Fusione Grana // Set the FX1 layer as: Grain Merge
- Duplicate FX1 e nominatelo come FX2 // Make a copy of FX1 and name it as FX2
- Andate su: filtri / sfocatura / movimento - zoom // go to: filter / blur / Motion blur - zoom

- Settate FX2 come: sovrapposto // Set FX2 as overlay


THE END


by
Kain the supreme